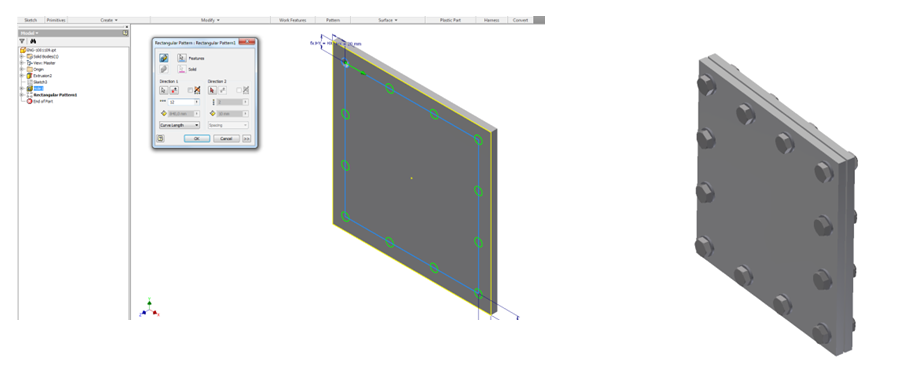
Draw a square sketch and let the hole pattern fill along the sketch. Now you can easily insert one set of bolt, nut and let it follow pattern.
Create a sketch for the first hole
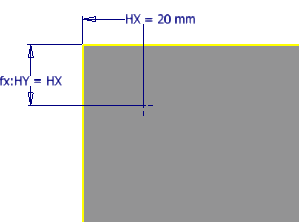
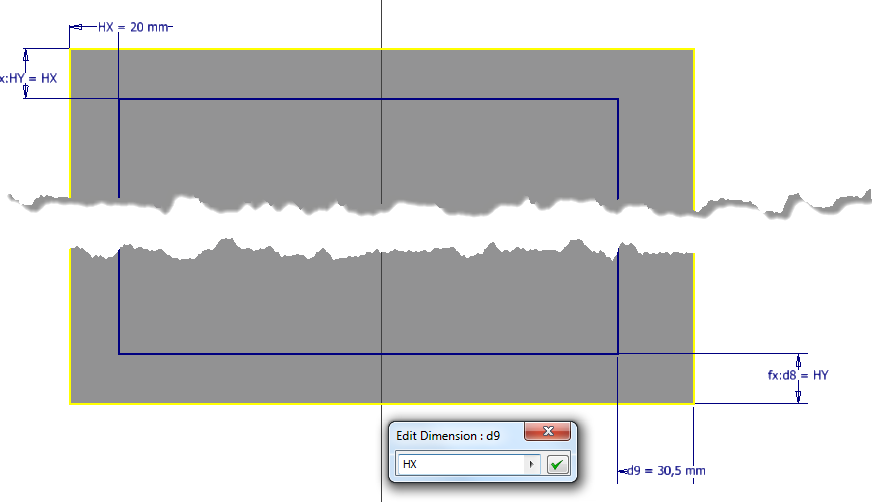
Create the pattern path and dimension it
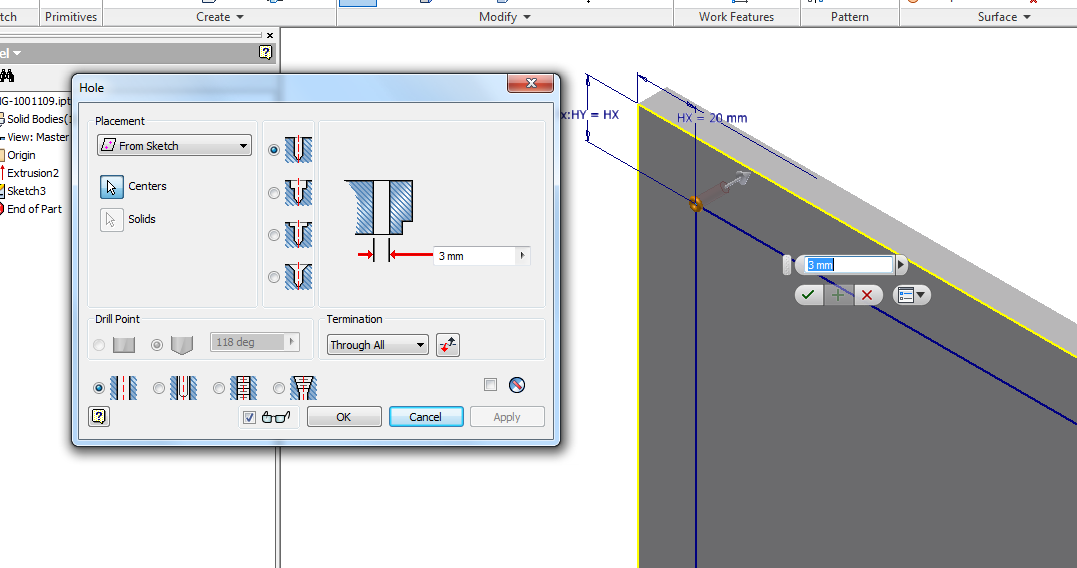
Create the first hole
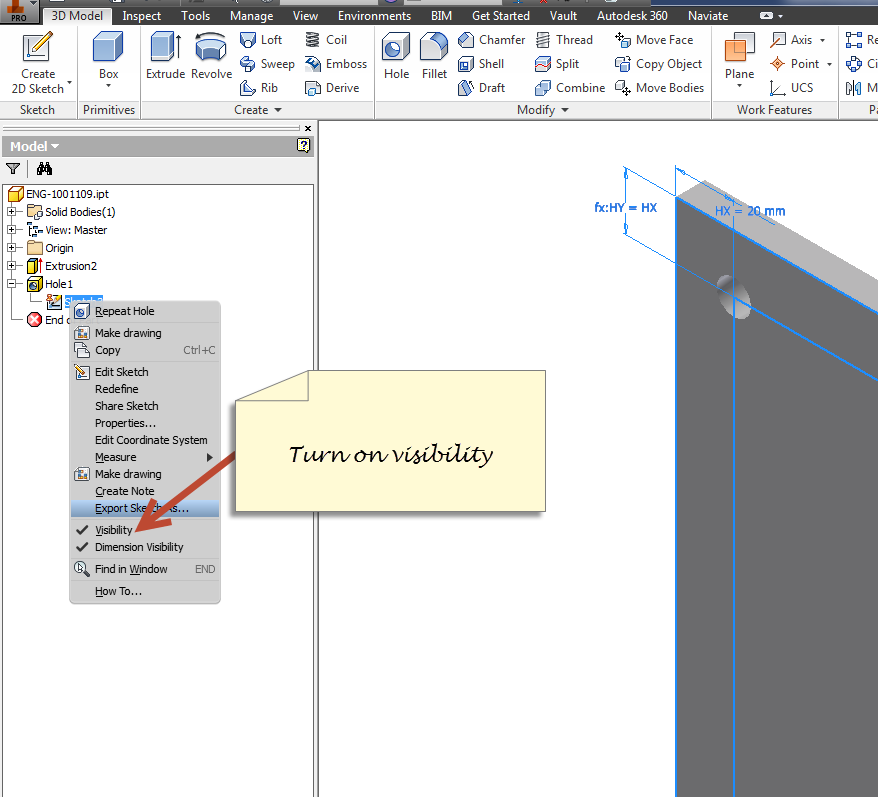
Turn on the sketch to access the
pattern path
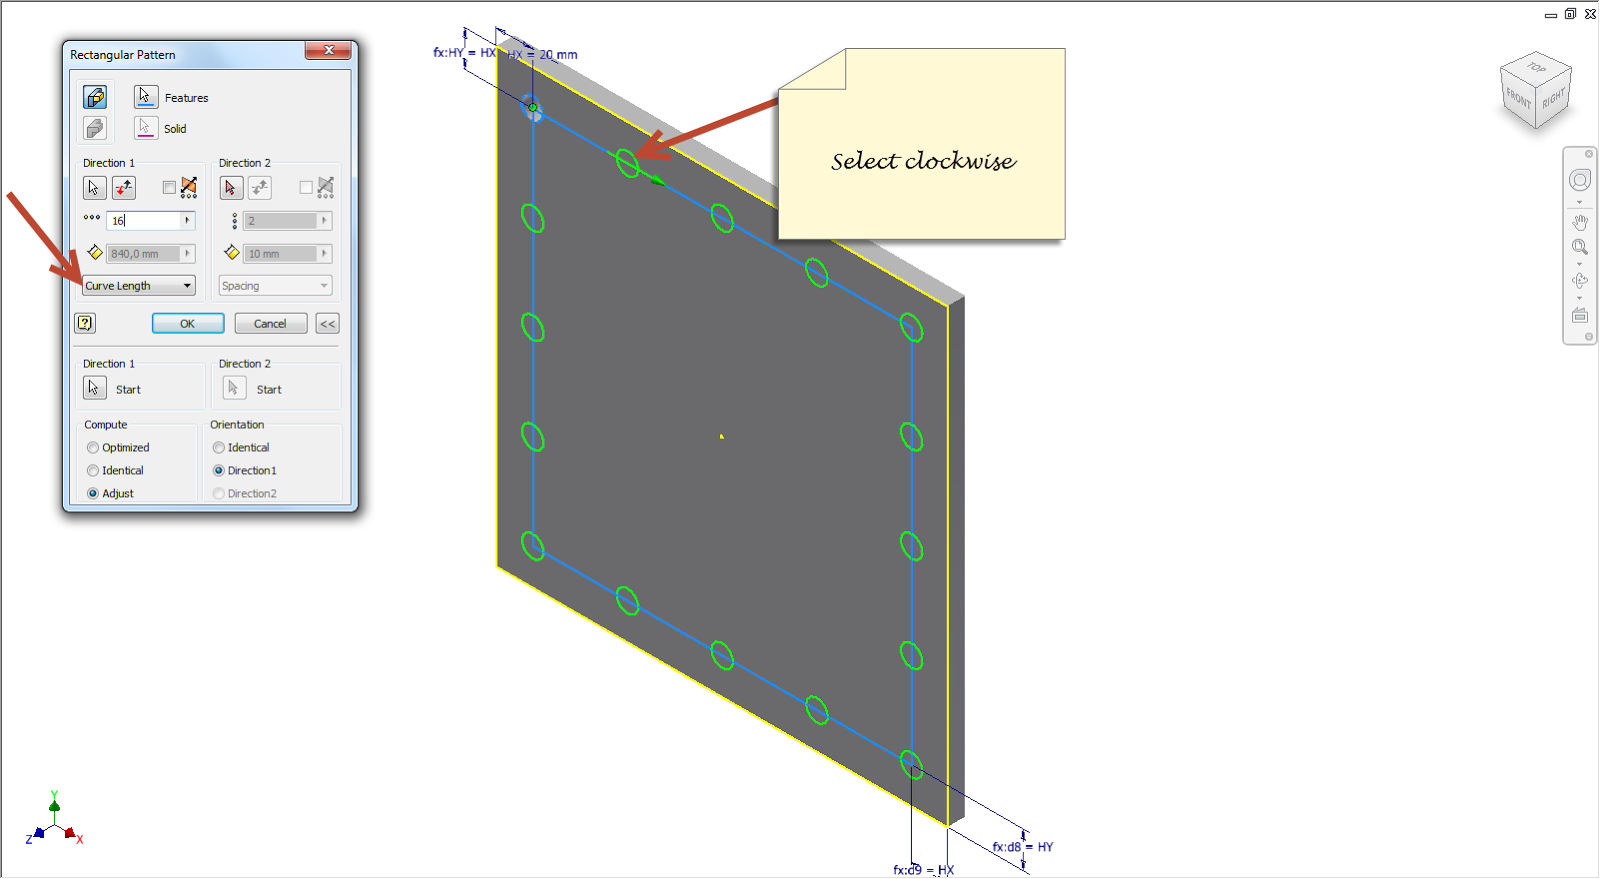
Select and decide holes in the
pattern. Remember to select clockwise direction. Also remember that the number
of holes must be dividable by number of sides. When finished turn off the
visibility in the sketch.(re : pt 4)
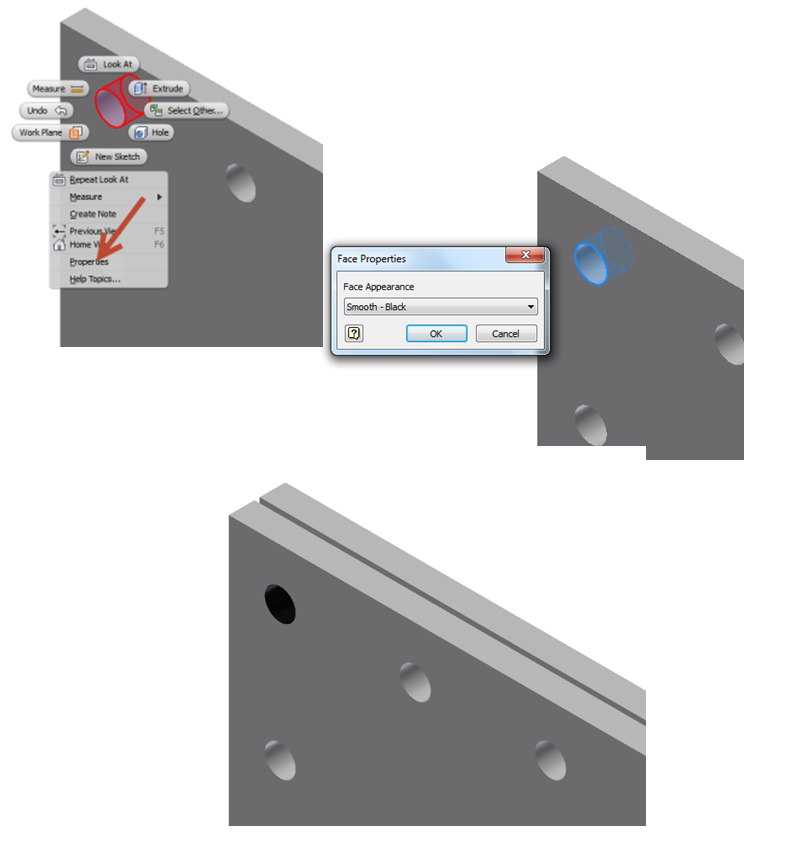
Mark the first hole for the next
person that opens the part. It’s good practice to mark the first hole in the
pattern to use this information in further work.
Select the hole , rclick and select properties. Select a color to get a visible difference.
To prosper from the pattern when inserting components :
If we have two plates assembled like this, insert Bolts, washers and nuts in the first hole of the pattern.
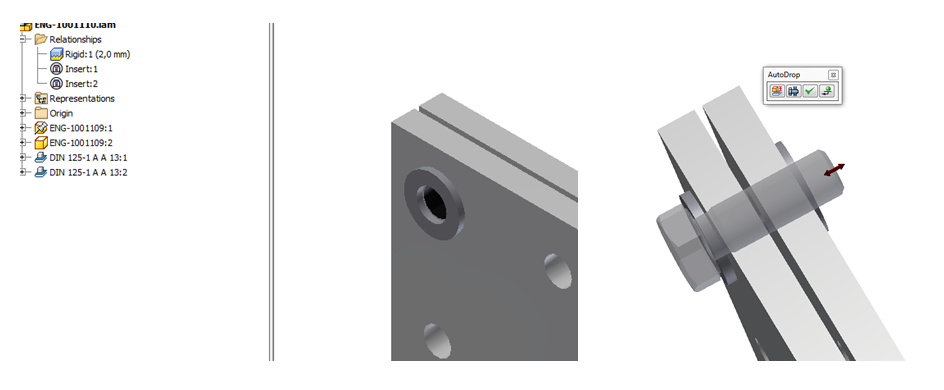
Select the inserted components and select rectangular pattern. Use “Feature pattern select” and select the pattern. Now you will fill the pattern with the components selected..
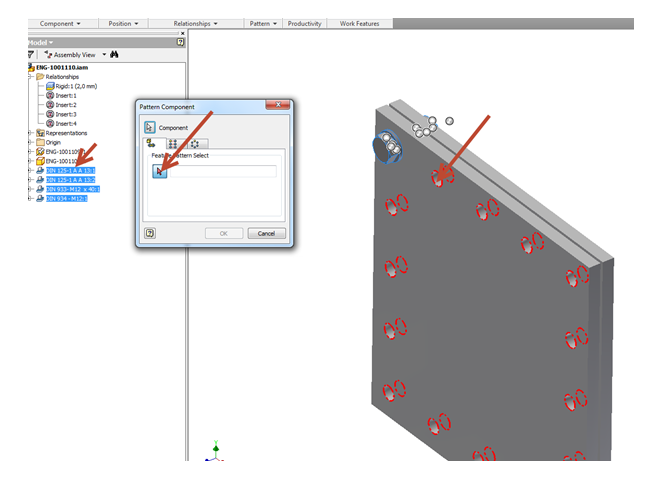
If you now go back and change the number of holes in the pattern, the number of components inserted will update accordingly